
|
Upgrading the stock exhaust. Most Smallframes have a completely useless exhaust, which does nothing except produce a nice put-put-put sound. The standard exhaust fitted to the ET3 is actually pretty good. However it's a bitch to remove when you need to change the rear wheel and for that reason alone it has to go! If you are kitting your engine then you will need to upgrade from the standard exhaust to get more power. Two-strokes are quite sensitive to the exhaust because back-pressure is necessary to help the combustion along. Too little and the engine won't run well, unburned fuel and fresh air going straight out of the exhaust. Too much and the engine won't run well either, as burned exhaust gases suffocate the incoming charge. There's a sweet middle ground, and most after-market performance exhausts are designed to maximise the performance within this area. Most of the available exhaust are really designed for kitted engines. They are really designed to remove the bottleneck in performance that a kitted engine with a stock exhaust has. Some work well on standard engines too. The Leovinci demonstrated here is one of those. I chose it on price, easy availability in the UK, and the fact that it is easy to remove to get at the rear wheel. It ain't pretty but I ain't rich. The Polini is similar. Other more expensive examples are made by Simonini, Zirri and PM Tuning. First we jack up the scooter on a milk crate pinched from outside a shop the night before:
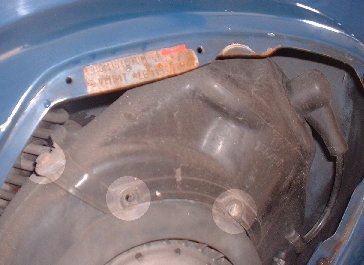
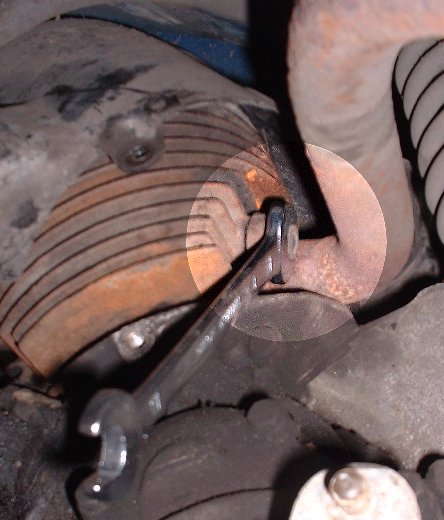
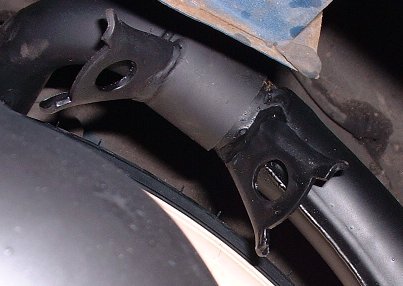
Then we remove the ET3 expansion box. Thank god we're never going to have to put it on again. First unbolt the expansion box from the downpipe. You'll need a socket set and a long extension. After you've done this let all the air out of the rear tyre, and use an open ended 17mm spanner to remove the bolt holding the expansion box to the engine crossmember. It's best to do this from underneath the bike. Now take the rear wheelrim off. This will make it easier to get at things. Because the Leovinci slides onto the bolt rather than needing it to be removed you can put the bolt back now, and re-inflate the tyre. Other types of exhaust may need to be bolted through, so you would need to keep the rear tyre deflated until the new exaust is fitted. If this is the case I reckon it's a worthwhile modification to take a hacksaw to the mounting hole and make it into a slot like the Leovinci's. I took the opportunity to take the wheel indoors and clean the whitewalls with washing up liquid and the bleach. These Sava MC12s don't discolour like Continentals, and clean up a treat. I will definitely be buying them again. By the way - notice my rear wheel does not have it's centre cap? That's because at this point I was going to replace my rear brakes. However I couldn't shift the damn hub nut, so a trip to a garage with impact wrench was needed on another day. Now we remove the plastic flywheel / cylinder shroud. This has one bolt at the side, one self tapping screw in the middle and one metal screw to the right (all highlighted in the picture). Take the spark plug out and maybe unclip the lead too to give yourself a bit more room. Now go back round to the other side of the scooter and undo one last screw on that side. You can now lift the shroud out of the way, just enough to get at the bolts. I also unbolted the rear shock to give myself a bit more room to play with. I found I was able to wedge the shroud up out of the way. Now we take off the downpipe. You'll need an open ended spanner for the clutch side, but you can use a socket on the flywheel side. (you can also see the hole where the shroud bolts on this side)
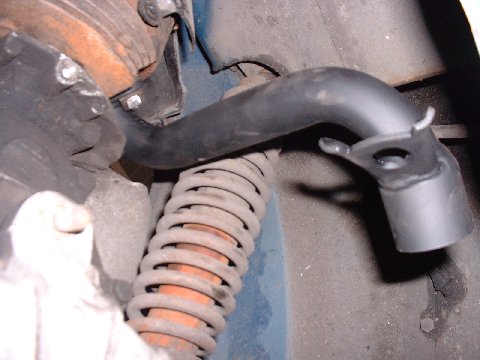
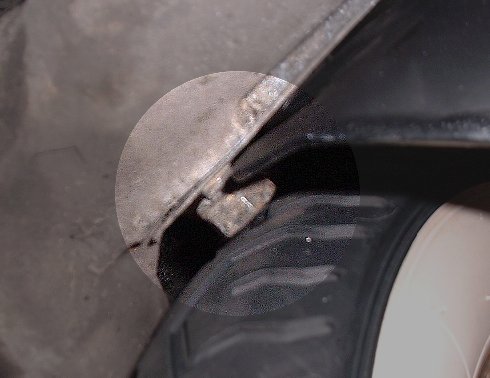
Replace it with the Leovinci downpipe. Here's mine after fitting. Replace the engine shroud. If you haven't already done it, replace the crossmember bolt. Now replace the rear wheelrim. Attach the Leovinci expansion box and partially tighten the crossmember bolt to hold it there. Here is the expansion box just about to be slid onto the bolt, along with a very clean rear tyre. Now mate the downpipe and the expansion box. You should still have enough play to do this easily.
I found the best way to attach the spring to the downpipe was to use a loop of string to pull it down and through the hook on the expansion box, then the string can be untied or cut. Keep a loop in your traveling toolkit just for this purpose. Now you can tighten up the frame nut fully - At this point adjust the fit and position of the expansion box to make sure it does not rub against the wheel.
There
we are, all done. It's a damn sight louder than the original
part, but seems to produce a little bit more power on acceleration,
perhaps losing some top end. I have been informed that when mated
with a properly ported Polini 130cc kit it really shines. Being
a clone of the Polini pipe that doesn't surprise me. |
 .
.